
Raspberry Pi Pico 2 Meshtastic Node with Waveshare LoRa HAT
There isn’t much clear documentation yet on building a serial Meshtastic node using the Raspberry Pi Pico 2 W (RP2350) with the Waveshare SX1262 LoRa module, so this guide walks through the full process. By the end, you’ll have a compact, USB-powered Meshtastic serial node that can connect directly to your computer or server, along with a simple 3D-printed case to protect it.
This setup is ideal if you want a reliable always-on serial node for use with the Meshtastic web client, MQTT gateways, or headless systems like a home server or Raspberry Pi.
Parts List
Core Components
- Raspberry Pi Pico 2 WH (with pre-soldered header)
https://amzn.to/4qSR4vD - Waveshare Pico SX1262 LoRa Node Module
https://amzn.to/46N1XIk
Using the Pico 2 WH version (with headers pre-installed) saves time and makes assembly plug-and-play.
3D Printable Case
A simple protective case is available here:
https://makerworld.com/en/models/2428204-pico-n0de#profileId-2663478
This enclosure keeps the boards aligned, protects the antenna connection, and makes the finished node much easier to deploy on a desk, shelf, or server rack.
Assembly Instructions
Assembly is extremely straightforward, but there are a few details worth noting if you want a clean, compact build that fits inside the provided 3D case.
1. Trim the Waveshare Header Pins (Optional but Recommended)
If you want the build to fit inside the case:
- Carefully trim the bottom header pins from the Waveshare module
- This allows the Pico and LoRa board to sit flush together
- Use flush cutters and take your time to avoid damaging the board
This step is optional but highly recommended for a clean enclosure fit.
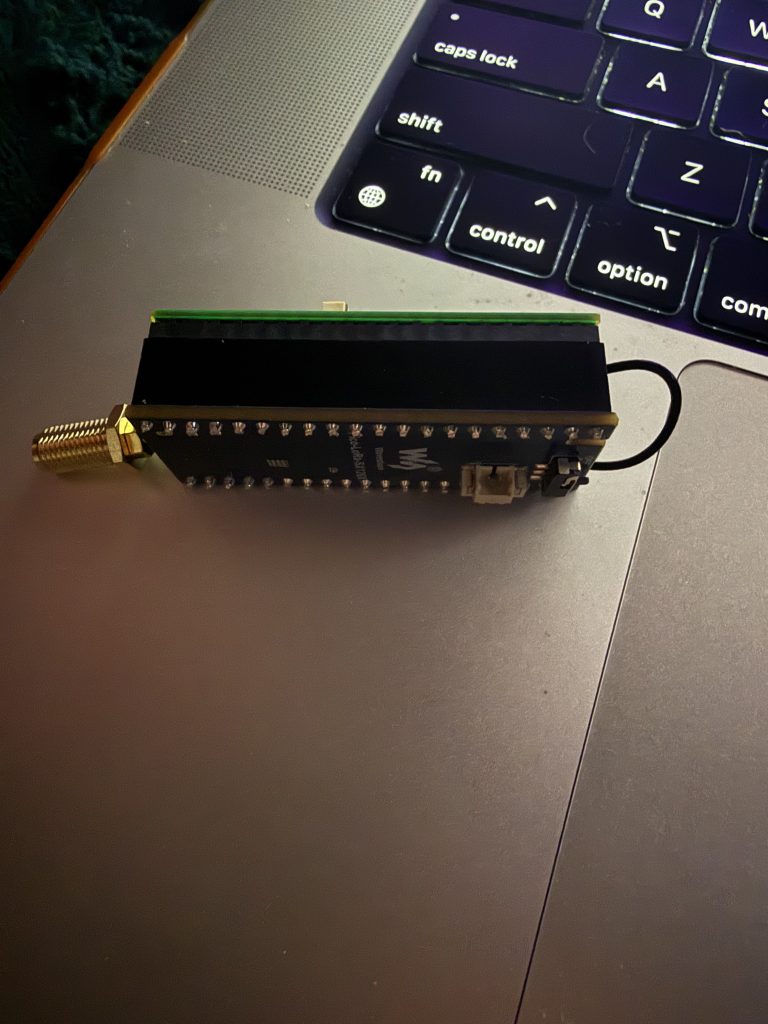
2. Board Orientation
When connecting the two boards:
- Position the Waveshare module so its power LEDs sit underneath the Pico’s USB connector
- Ensure all header pins align cleanly before pressing together
- Do not force the connection — they should slide together easily
Correct orientation ensures proper power and SPI communication between the Pico and SX1262 module.
3. Antenna Placement
Once assembled:
- Connect your antenna to the Waveshare module
- Gently tuck any excess antenna wire between the two boards
- Avoid sharp bends or pinching the cable
Keeping the antenna wire neatly routed prevents strain and keeps everything fitting inside the case.
Flashing Meshtastic Firmware to the Pico 2
1. Download Firmware
Go to the official Meshtastic firmware releases page:
https://github.com/meshtastic/firmware/releases
For this build, use the latest RP2350 (Pico 2) firmware.
Example used:
https://github.com/meshtastic/firmware/releases/download/v2.7.19.bb3d6d5/firmware-rp2350-2.7.19.bb3d6d5.zip
Inside the zip file you’ll find two firmware files:
- Pico 2 (non-WiFi)
- Pico 2W (with WiFi)
Make sure you choose the correct one for your board:
- Pico 2 WH = use Pico 2W firmware
2. Enter Bootloader Mode
To flash the Pico:
- Hold down the BOOTSEL button on the Pico
- While holding it, plug the Pico into your computer via USB
- Release BOOTSEL after plugging in
Your computer will detect a new removable drive (like a USB flash drive).
3. Flash the Firmware
- Drag and drop the correct
.uf2firmware file onto the Pico drive - Wait a few seconds
- The Pico will automatically flash and reboot
You may see a message saying the device was ejected improperly — this is normal and can be ignored.
Firmware installation is now complete.
Connecting to Meshtastic
After flashing:
- Unplug the Pico
- Plug it back into your computer
- Visit: https://client.meshtastic.org
- Select your device from the connection list
Once connected:
- Set your region
- Configure node name
- Adjust LoRa settings if needed
- Join your preferred channels
If you’re in the Asheville area, be sure to join the MeshAVL channel and say hello.
Why Use This Setup?
This Pico 2 + SX1262 build makes an excellent:
- Dedicated serial node for desktop or server use
- MQTT gateway node
- Always-on base station
- Low-power monitoring node
It’s inexpensive, compact, and extremely stable when used over USB serial — no battery or screen required.
Final Thoughts
The Raspberry Pi Pico 2 combined with the Waveshare SX1262 module creates one of the simplest and most affordable Meshtastic nodes you can build. With minimal assembly, quick firmware flashing, and a clean 3D-printed enclosure, you can have a reliable serial node running in minutes.