

Building Asheville’s Off-Grid Mesh Network
A local hub for MeshCore and Meshtastic users building a stronger LoRa mesh network across Asheville and Western North Carolina. We focus on MeshCore’s stability, simplicity, and reliability while connecting nodes, sharing knowledge, and expanding low-power communication throughout our mountain region.
Built by Local Meshers
Expanding Asheville’s Off-Grid Communication Network
MeshAVL exists to bring together MeshCore, Meshtastic, and LoRa enthusiasts across Asheville and the surrounding mountains. Our mission is to build a decentralized, low-power communication network that doesn’t rely on traditional infrastructure.
We’re a community of builders, tinkerers, preppers, hikers, radio nerds, and curious tech people working to strengthen resilient off-grid connectivity throughout the region. Some of us are here because mesh networking is simply fun to experiment with. Others are focused on emergency preparedness, encrypted communication, and dependable coverage in remote mountain areas.
The goal is simple: learn together, deploy more nodes, expand coverage, and build a resilient, community-owned mesh network across Western North Carolina.
MeshAVL FAQ
What you need to know before joining the mesh
What is MeshCore?
MeshCore is a lightweight, LoRa-based mesh networking protocol designed to create decentralized, low-power communication networks without relying on cellular towers or internet infrastructure.
Like Meshtastic, MeshCore allows small radio nodes to pass messages from one device to another across long distances. However, MeshCore focuses on:
Simple, stable firmware
Reliable routing behavior
Efficient performance in challenging terrain
Beginner-friendly setup and management
In mountainous regions like Western North Carolina, where elevation changes and terrain can affect signal paths, MeshCore’s routing and firmware stability make it especially well-suited for building dependable regional mesh networks.
MeshCore nodes can be used for off-grid messaging, emergency preparedness, experimentation, and community-driven communication systems.
What is Meshtastic?
Meshtastic is a low-power, long-range communication system that uses LoRa radios to create decentralized mesh networks. Devices pass messages between each other, allowing communication without cell service, WiFi, or internet.
Should I use MeshCore or Meshtastic in Asheville?
Both MeshCore and Meshtastic are capable LoRa mesh protocols, and both have active communities. However, for Asheville and the surrounding mountain terrain, many in the MeshAVL community prefer MeshCore.
Here’s why:
Why choose MeshCore in Western NC?
More stable firmware behavior
Simpler configuration for beginners
Reliable message handling in mountainous terrain
Strong performance for fixed-node regional coverage
Why some still use Meshtastic:
Larger global user base
More consumer-friendly mobile apps
Broad hardware compatibility
If your goal is experimentation or joining the larger national network, Meshtastic may make sense. If your goal is building a stable, resilient, region-focused mesh network across Asheville and the mountains, MeshCore is often the better fit.
At MeshAVL, we support both — but we’re actively building and expanding our MeshCore network across Western North Carolina.
Do I need internet for this to work?
No. Once your device is set up, Meshtastic works completely off-grid. Messages travel from node to node over radio. Internet is only needed for initial setup, firmware updates, or optional features like MQTT.
How far can messages travel?
Range depends heavily on terrain and elevation. In dense parts of Asheville you might see a mile or two between portable devices, while elevated or rooftop nodes can relay messages much farther. With enough nodes online, messages can hop across the entire region.
Is this legal to use?
Yes. Meshtastic operates on unlicensed ISM bands that are legal in the United States when devices are configured correctly (set region to US). No ham radio license is required for normal use.
Why are we building a mesh network in Asheville?
Because it’s fun, useful, and a little bit nerdy. The goal is to create a low-power, community-owned communication network that works during outages, in remote areas, and anywhere traditional infrastructure is unreliable — while also giving local tech and radio enthusiasts something cool to build together.
Join the meshAVL Community
Connect with local node operators and builders
Join Us on MeshCore
Important channels to join in this area other than the Public channel are #meshavl, and #ncmeshJoin Us on Meshtastic
If your phone is connected to your Meshtastic device via Bluetooth then you can either Click Here, or scan the QR code below:

Choosing A Device
Start simple, get on the mesh, upgrade later
Getting on Meshtastic doesn’t have to be complicated. There are a lot of devices out there, but a few stand out depending on how plug-and-play vs. DIY you want to go. If you’re just getting started and want something that works well out of the box, here’s where we recommend beginning.
Best Starter Device
SenseCAP Card Tracker T1000-E
If you only buy one device to start, this is the one.
The SenseCAP Card Tracker T1000-E is hands down the easiest and most reliable way to get onto the mesh. It’s roughly the size of a credit card, has an exceptionally well-tuned internal antenna, and comes fully assembled and ready to go. The antenna performance alone makes it one of the best portable nodes available — many users report surprisingly strong range without needing external antennas or modifications.
It’s also IP65 rated and waterproof, so you can throw it in a backpack, mount it to a bike, or carry it daily without worrying about weather. Built-in GPS, Bluetooth, and a rechargeable battery make it a true standalone mesh device that just works. The credit-card sized form factor makes it easy to keep on you at all times while still maintaining low-power, long-range communication.
Why it’s the best starter device
No assembly or flashing required
Excellent internal antenna tuning and range
Ultra portable and pocket-friendly
Waterproof rugged case
Great for daily carry, testing coverage, and events
If your goal is to quickly get on the Asheville mesh and start experimenting, this is the move.
Click Here to purchase a T1000-E on Amazon for about $50
Second Choice
LilyGo T-Echo
The T-Echo is the next best all-in-one device and a favorite in the Meshtastic community. It has a built-in screen, GPS, and low-power hardware designed specifically for off-grid messaging and mesh networking. It works as a standalone communicator without needing a phone once configured, and power consumption is excellent for portable use.
Pros
Standalone messaging device
E-ink display for ultra low power
Solid battery life
More “gadget-y” and fun to tinker with
Cons
Antenna usually benefits from upgrading
Slightly less plug-and-play than the T1000-E
Not weatherproof without a case
Great if you want something you can interact with directly and don’t mind a bit more tinkering.
Other Solid Options
Heltec V3 (DIY favorite)
Cheap, flexible, and everywhere. Great if you enjoy building and customizing your own node.
Pros
Very affordable
Tons of community support
Great for fixed nodes and experiments
Cons
Requires assembly, flashing, and setup
Needs case + battery
Not beginner plug-and-play
RAK WisBlock
Excellent for permanent or solar nodes and rooftop installs.
Pros
Extremely power efficient
Modular and expandable
Ideal for solar/off-grid nodes
Cons
Not beginner friendly
Requires building and configuration
More of an infrastructure node than daily carry
T-Deck (power user territory)
Full keyboard, screen, and standalone messaging computer.
Pros
Self-contained communicator
Huge battery options
Great for emergency/off-grid comms
Cons
Expensive
Large
Overkill for first device
Our Recommendation
Start with something easy. Get on the mesh. Start mapping coverage and talking to other nodes.
For most people:
1. SenseCAP T1000-E (best overall starter)
2. T-Echo (great second option)
3. RAK if you want to build infrastructure
The faster you get a node online, the faster Asheville’s mesh grows.
Firmware Flashing
Getting MeshCore or Meshtastic onto your device
Most LoRa mesh devices need firmware installed before they can join a network. Some ship ready to go, others require flashing. Either way, don’t stress — this is usually a one-time setup and only takes a few minutes.
Whether you’re installing MeshCore or Meshtastic, the overall process is very similar.
Easiest Method: Web Flasher (When Available)
Both MeshCore and Meshtastic offer simple flashing tools for supported devices.
In most cases, you:
Plug your device into your computer via USB
Open the appropriate web flasher (MeshCore or Meshtastic)
Select your device type
Click install
Wait for it to complete
Most web flashers work best in Chromium-based browsers like Chrome, Edge, or Brave.
Once firmware is installed, you’ll connect using the corresponding mobile app or desktop client to configure:
Region (US 915 MHz for Western NC)
Node name
Channel settings
Role (client, router, repeater, etc.)
If you can follow on-screen instructions and click a few buttons, you can flash firmware.
Devices That Often Ship Pre-Flashed
Some devices may arrive with firmware already installed — either MeshCore or Meshtastic — depending on where you purchased them.
Examples may include:
SenseCAP T1000-E
LilyGo T-Echo
Prebuilt Heltec kits
Preconfigured RAK WisBlock builds
Even if your device ships ready to use, it’s still important to learn how firmware updates work. Updates improve performance, fix bugs, and sometimes enhance routing or radio behavior.
When You’ll Need to Flash Manually
DIY boards almost always require flashing the first time. Common examples:
Heltec V3
RAK WisBlock
Waveshare boards
Raspberry Pi Pico + LoRa HAT builds
Custom serial nodes
Manual flashing typically involves:
Connecting via USB
Entering boot/flash mode (sometimes by holding a button during power-up)
Using the web flasher or command-line tools
Installing the latest stable firmware
Once installed successfully, you usually won’t need to repeat the process unless updating or experimenting with new releases.
Common Flashing Mistakes
Wrong firmware selected
Always choose the correct firmware for your exact board model.
Bad USB cable
Many USB cables are power-only. If your device isn’t detected, try a known data-capable cable.
Browser issues
Use Chrome, Edge, or another Chromium browser for web flashing. Safari and Firefox often don’t support serial flashing.
Not entering boot mode
Some boards require holding a button while plugging in to enter flash mode.
After Flashing
Once MeshCore or Meshtastic firmware is installed:
Install the corresponding app (mobile or desktop)
Connect via Bluetooth, WiFi (if supported), or USB
Set your region (US 915 MHz is required here)
Name your node
Configure your channel
Join the local network
That’s it — you’re on the mesh.
Flashing firmware might sound intimidating at first, but after doing it once, you’ll realize it’s basically like installing an operating system onto your radio. It’s the first step toward building a resilient, decentralized communication network across Asheville and the mountains.
Configuring MeshCore
Setting up your node for Western North Carolina
Once MeshCore firmware is installed, the next step is configuring your node so it can properly join and strengthen the local network.
MeshCore is designed to be simple and stable. Most configuration is done through the companion app, and once set up correctly, you rarely need to change anything.
Step 1: Set Your Region (Required)
For Asheville and Western North Carolina, your node must be configured for the US 915 MHz ISM band.
Using the wrong region can:
Prevent you from connecting to local nodes
Cause interference
Violate FCC regulations
Always confirm you are set to the correct regional frequency before deploying.
Step 2: Choose the Correct Node Type
MeshCore uses three primary device types. Choosing the right one is important.
Companion Nodes
A companion node is a small personal device that connects you to the mesh.
Battery-powered or USB-powered
Typically pairs with a smartphone via Bluetooth
Used for messaging and interacting with the network
Does not route packets
Companion nodes can talk directly to nearby nodes, but they do not forward traffic across the network. They rely on repeaters to move messages beyond their immediate range.
Standalone devices like the T-Deck include a screen and keyboard, but they are not ideal for beginners due to firmware maturity.
For most users just getting started in Asheville, a companion node is the right choice.
Repeaters
A repeater is a fixed installation that forms the backbone of the MeshCore network.
Mounted at elevation (roof, mast, ridge, tower)
Runs continuously on mains or solar power
Extends range and links mesh segments
The only devices that perform packet routing
Repeaters are critical in mountainous terrain like Western North Carolina. Elevation dramatically improves reliability and coverage.
If you’re installing a node permanently at height, it should be configured as a repeater.
Room Servers
A room server is a specialized MeshCore device that functions like a persistent chat room or mini message board.
Stores the last 32 messages sent to it
Companion nodes retrieve stored messages when connecting
Designed for shared conversation spaces
While room servers technically have the ability to repeat, this is strongly discouraged. They are not full repeaters and lack important routing features. In many networks, repeat functionality is disabled entirely.
Room servers are best used as static message boards or community chat nodes — not as backbone infrastructure.
Step 3: Name Your Node
Choose something identifiable but not overly personal.
Good examples:
AVL_Ridge
MeshAVL_01
WNC_Repeater_North
Avoid:
Full legal names
Exact home addresses
Sensitive information
Clear naming helps visualize coverage and understand routing across the region.
Step 4: Match Community Radio Settings
All MeshCore nodes must share the same radio parameters to communicate.
That includes:
Frequency
Bandwidth
Spreading factor
Coding rate
If your settings don’t match the local network, you will not connect — even if you’re physically close to another node.
Always use the recommended MeshAVL radio preset for Western NC.
Step 5: Test and Optimize
After configuring:
Send a test message
Confirm acknowledgment
Check signal strength (RSSI / SNR)
In the mountains, small adjustments matter:
Elevation beats power
Quality antenna placement is critical
Keep coax short and efficient
Avoid low-quality “cellular marketing” antennas not tuned for 915 MHz
In Western North Carolina terrain, a well-placed repeater at elevation will outperform a high-power node in a valley every time.
Keep It Simple
MeshCore’s strength is stability.
Set the correct region.
Choose the correct node type.
Match community settings.
Deploy thoughtfully.
Then let the mesh grow.
First-Time Device Setup
Configure these settings before joining the public channel
Once your device is flashed and connected to the Meshtastic app, there are a few important settings to configure before you’ll be able to chat on the public mesh. Most of this only takes a few minutes and only needs to be done once.
1. Set Your Region (Required)
This is the most important setting.
Go to:
Settings → LoRa → Region
Set region to:
US
If this is not set correctly, your device won’t communicate properly with other nodes. The region determines legal frequency ranges and power limits, so always confirm this first.
After changing region, your device may reboot. That’s normal.
2. Set a Node Name
Go to:
Settings → User
Choose a simple node name so others can recognize you on the mesh. This can be anything:
Examples:
AVL-Chris
MontfordNode
TrailNode
PisgahLink
RoofTopWest
Keep it clean and recognizable. This helps when mapping coverage and troubleshooting connections.
3. Choose a Role
Go to:
Settings → Device Role
For most people starting out, use:
Client
This is the standard mode for portable and personal devices. If you later build a permanent rooftop or solar node, you can switch roles, but for now just keep it simple.
4. Confirm Your Channel Settings
To chat with the local mesh, your device must be on the same primary channel as everyone else.
Go to:
Settings → Channels
Make sure:
You have a Primary Channel
It is using the default public channel
Encryption is enabled (default)
If you’re using the standard Meshtastic public channel, you usually don’t need to change anything here. Once you’re connected to other nodes, messages will begin flowing automatically.
5. Turn On Bluetooth (for phone use)
If you plan to use your phone to send messages:
Go to:
Settings → Bluetooth
Make sure Bluetooth is enabled so your phone can stay connected to the device. Most portable nodes rely on your phone as the interface.
Standalone devices like the T-Echo can send messages directly, but most people still pair them with a phone.
6. Send a Test Message
Once configured:
Open the Messages tab
Select the primary/public channel
Send a short message
Something like:
“Test from North Asheville”
“New node online”
“Checking coverage”
If other nodes are within range, you’ll start seeing messages appear. Sometimes it takes a few minutes for routing to establish, especially if the mesh is sparse.
7. Leave It On
Meshtastic works best when nodes stay online. Even portable nodes help relay traffic while powered on.
At home:
Leave a node running near a window
Put one on a desk or shelf
Consider a small base node later
Every active node strengthens the network.
Once your region is set, name is chosen, and channel is confirmed, you’re officially part of the Asheville mesh.
Latest LoRa, Meshtastic, and Meshcore Articles
Using meshcore-cli with a USB Companion Node
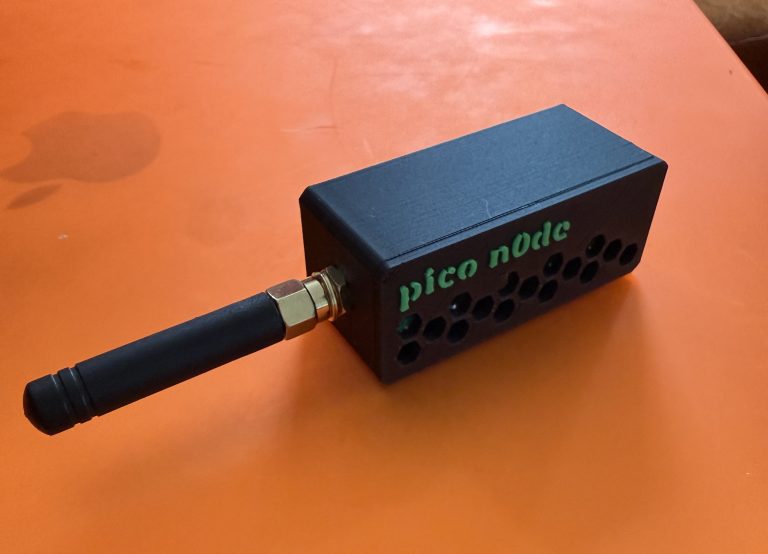
Raspberry Pi Pico 2 Meshtastic Node with Waveshare LoRa HAT
Contribute to the Mesh
Help expand coverage, knowledge, and infrastructure
MeshAVL is a community-built project and always will be. If you have guides, local coverage info, device tips, or anything that could help others get connected, we’re open to adding it to the site. We’re also building toward a stronger physical network across Asheville, which means more nodes in more places. If you’d like to support the project through equipment donations, hosting a node, or helping fund future repeaters and infrastructure around town, reach out and get involved.